
【前言】
Hey , guys!
At first , Sorry about that my English is not so good!
If you have any Questions , or You have another solution !
feel free to leave the message to me~
I write this tutorial in two Language version!
if you aren't Chinese , please jump to tutorial directly!
there are so many pictures, so i separated this tutorial into 2 parts.
================================================
小弟我因為想要搞台server來玩玩~
託鳥哥大神的福,買了他兩大本書來啃...準備來好好學習一下Linux!
因為要玩Linux,為了怕玩壞我目前主要來做事情的筆電~
於是就想說乾脆買台小筆電來玩好了~
結果又因為不小心看到一個台灣之光vgod的一篇文章-為甚麼我用Mac...讓我想說...
那何不買mac勒~不過我不是像他那種Geek....我只是奈米大小的程式員
另外,還有參考這篇文章發表在2010年初的文章HOWTO install CentOS on a MacBook Pro
於是乎,就在這次的2011年的春季電腦展出手買了台MBP!
就在安裝時....小弟先安裝5.5版....結果給我死在一個莫名其妙的地方 欲知詳情請點選
問遍各地~就在姑且一試的新版的心態下! 幹! 我灌好了! 廢話不多說!!!!請看...
[第一部分教學-tutorial -- Part 1]
1. 首先我需要哪些東西哩 - 1. What I need at First
a. 一台蘋果電腦 (這不是廢話....)
- a. A MacBook
My Macook Specs as below
13 inch:2.3 GHz
- 2.3GHz dual-cores
Intel Core i5 - 4GB 1333MHz
- 320GB 5400-rpm
- Intel HD Graphics 3000
- b. CentOS-5.6-x86_64-bin-DVD
- - b. CentOS-5.6-x86_64-bin-DVD
c. 安裝 rEFIT 這是為了以後開機的方便!
- install rEFIT , You can use it to boot multiple operating systems easily
2. 先用MacBook已內建的BootCamp 用拉的切割出你所需要的空間大小 (我是切割80Gb)
- use bootcamp to partion Installation space (i reserved 80GB)
3. 接著就一直按下一步,直到安裝開始(別忘放入光碟)
- click "next" bottom and don't forgot put DVD in DVD-ROM! let's start!
4. 他會詢問你要用哪種安裝模式,直接按下Enter 進入到GUI安裝介面
- click keyboard "enter" , and Get into GUI installation!
5. 接著開始loading
- wait for loading
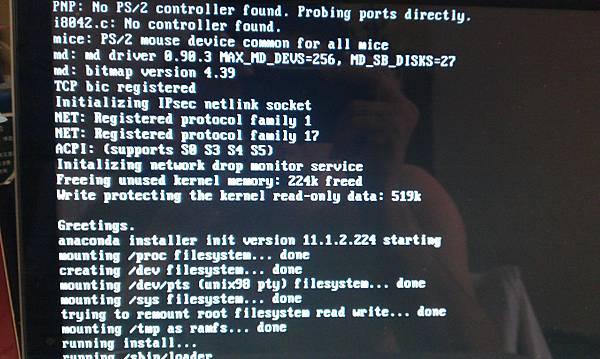
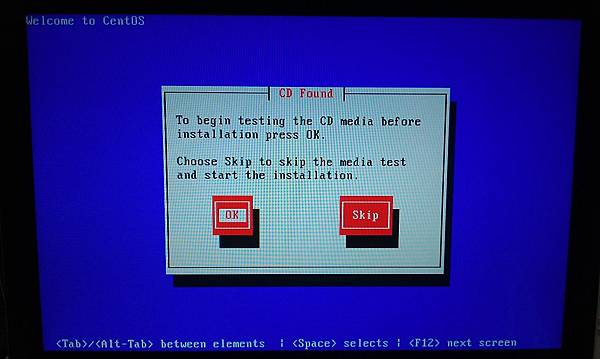
6. 詢問你是否要測試DVD ! 我是直接按否,因為我用MacBook燒錄時,已經有檢查過
- See pic
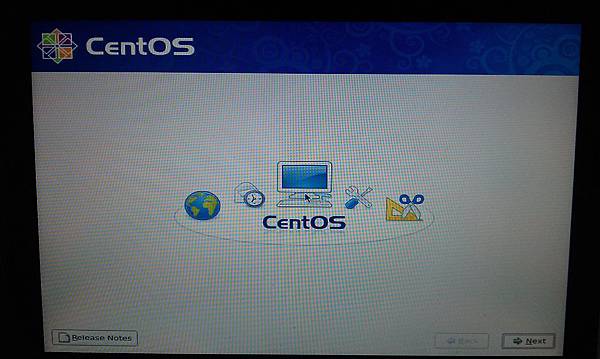
7. 進入到安裝畫面,請點選Next
- Click "next" bottom
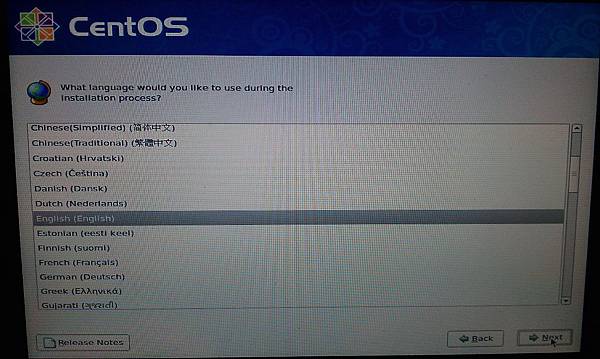
8. 選擇安裝時要用的語言 - 我是選繁體中文啦~
-See pic
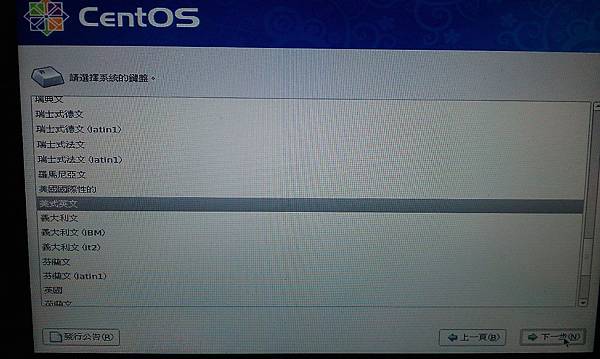
9. 選擇系統鍵盤 - 我選美式英文
- Choose your Keyboard type
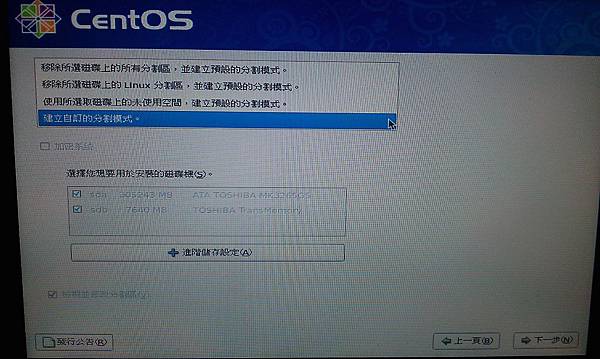
10 . 選擇安裝的磁碟分區 - 我是選擇自訂的分割模式
- Select Customized mode!
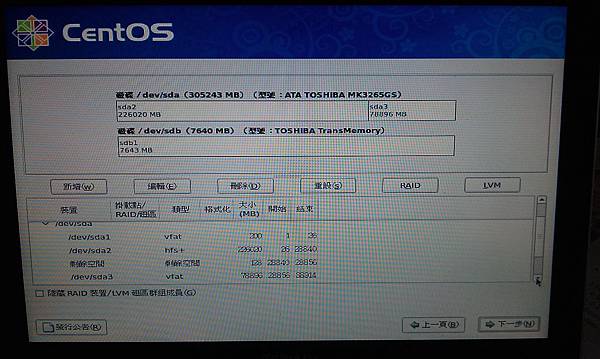
11. 這邊是重點了! 你可以看到你有/dev/sda3
這個你剛剛用bootcamp分出來的區域!
接下來.....你一定想要直接點選他並按下一步,
不過你會發現沒辦法灌.....還有可能會當掉...
-Now you can see your partition!
- it's is important that you can't choose /dev/sda3 and Click "Next" bottom to install it !
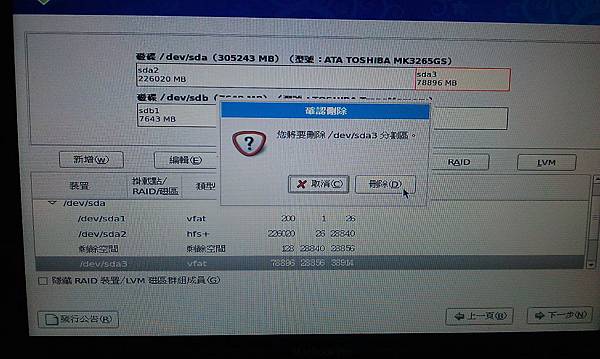
12 . 你必須點選他,然後按"刪除" ! 別懷疑! 就是刪除!!!
- all you have to do is click "/dev/sda3" and
- and click "delete" bottom!
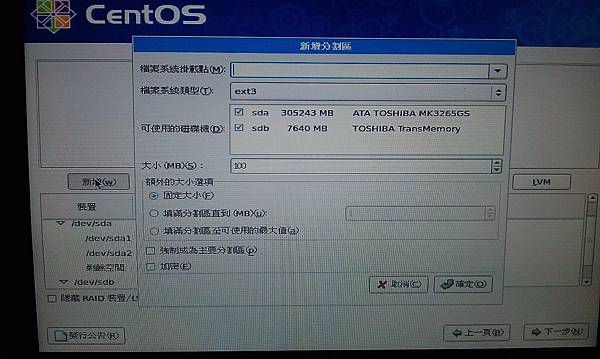
13 . 請按新增,請在檔案系統掛載的空格輸入/
檔案系統類型選擇ext3,建立根目錄,請把sda和sdb勾勾取消掉!
並設定檔案大小 (我設定為69000MB)
- Click "new" bottom and Keyin / in Mount!
- select file type ext3,
- You can "NOT" agree with sda and sdb terms
(pic just show the first screen when you Click "New" Bottom)
- set Space (unit is MB)
14 . 相同步驟! 按下新增
不用輸入檔案系統掛載點,
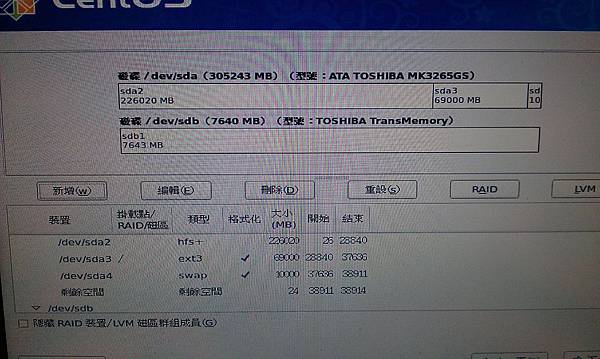
檔案系統類型選擇->swap ,設定檔案大小
- as the same step 13, but this time
- only have to is choose File type to SWAP
- and set Space
15 . 恭喜! 你已經分割好主要的硬碟! -
(另外,由於小弟是初心者~所以就分成這兩個! 若你已經很熟悉檔案系統
,可依你需求分割!)
- Congratulations ! We finish first part!
- if you are familiar with Linux , you can set up your partitions as you wish!


 留言列表
留言列表
